[Blog] Jekyll Theme Chirpy에서 Giscus 댓글 기능 사용하기
[Blog] Jekyll Theme Chirpy에서 Giscus 댓글 기능 사용하기
Jekyll Theme Chirpy에서 댓글 시스템을 연동해서 쉽게 사용할 수 있다.
지원하는 댓글 시스템은 총 3가지이다.
| 시스템 | 연동 방식 | 로그인 방식 | UI 및 특징 | 라이센스 | 기타 |
|---|---|---|---|---|---|
| Disqus | 자체 플랫폼 | 소셜 계정 가능 | 광고 가능, 속도 느림 | 무료/유료 플랜 | Demo |
| Utterances | GitHub Issue | GitHub 계정 | 이슈 기반, 가볍고 빠름 | 오픈소스/무료 | Guide |
| Giscus | GitHub Discussions | GitHub 계정 | Reaction, 정렬 지원 | 오픈소스/무료 | Guide |
나는 이 중에서 Giscus를 사용하기로 결정했다!
일단 무조건 무료로 사용하길 원했다.(Discus 탈락!)
그리고 오픈소스라면 현재도 활발히 개발하고 있어야했다.(Utterances는 블로그 작성일 기준 3년 전이 마지막 커밋.. 탈락!)
Giscus는 댓글 기능 + 포스트 리액션과 정렬 등 부가기능이 있고, 활발히 활동(?) 중이라서 이걸 쓰기로 결정했다.
저장소에 Giscus 활성화

Giscus를 사용하려면 3가지 조건이 있다.
- 공개(public) 저장소 -> 이건 이미 되어있으니 생략
- GitHub에 giscus app 설치
- 설치 시 내 블로그 저장소 활성화
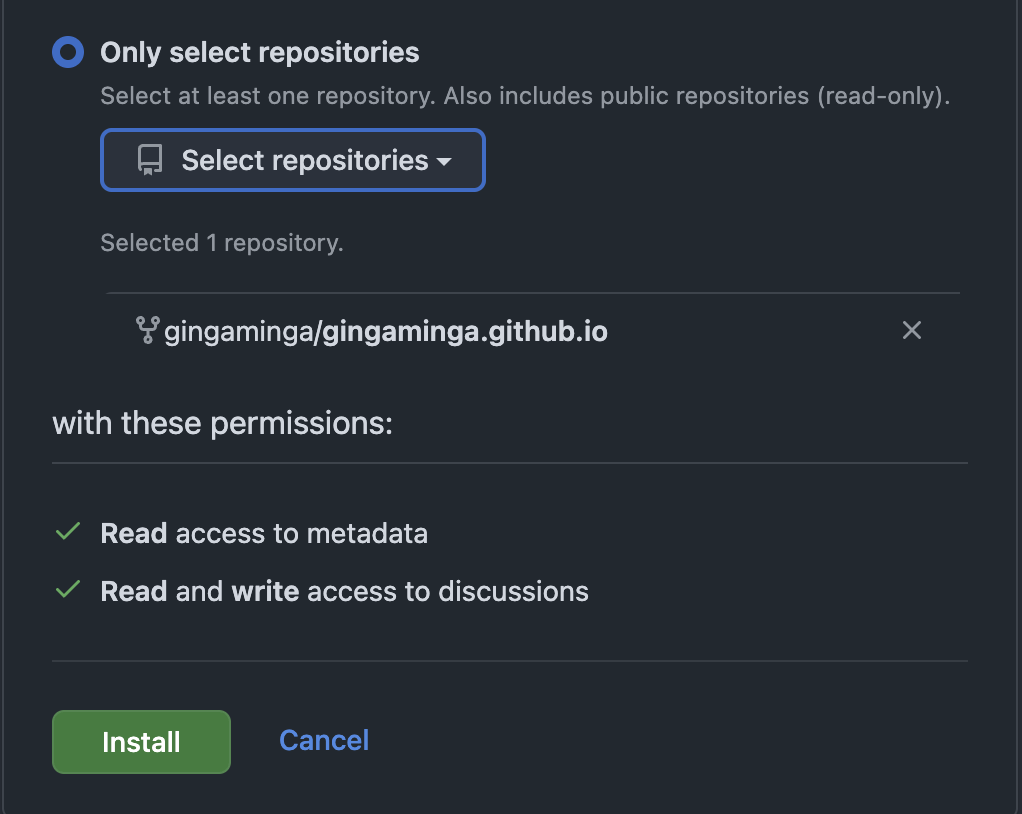
- 설치 시 내 블로그 저장소 활성화
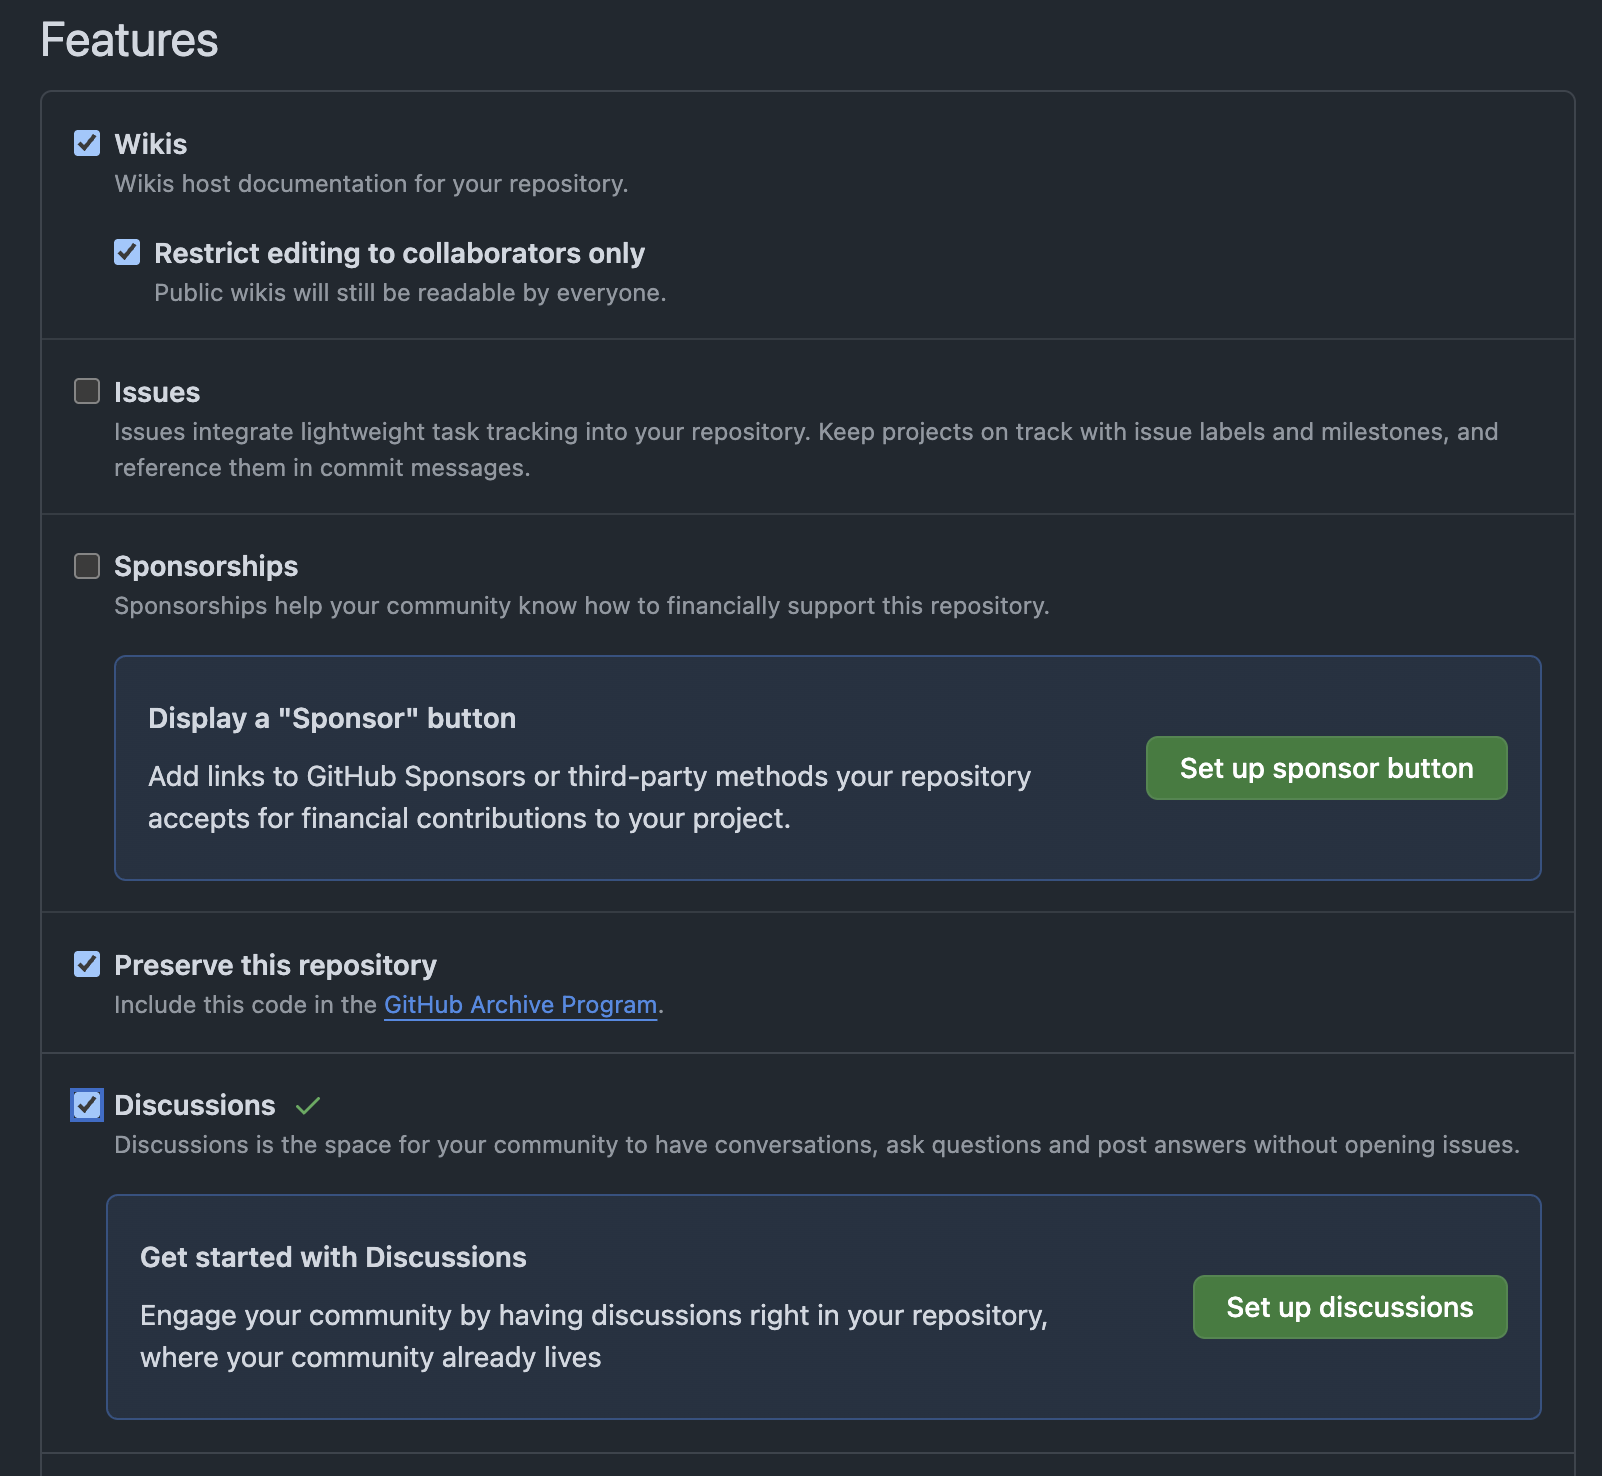
- 내 저장소에 Discussions 활성화
- Settings > General > Features의 Discussions 체크
- 이걸 활성화하면 저장소 메뉴에
Discussions가 생긴다.
Discussions Category 설정하기
블로그 글 하나당 하나의 Discussions이 생기고 그 Discussions에 댓글들이 쌓이는 형태다. 이 Discussions를 묶어서 관리할 카테고리를 지정해야한다.
Giscus에서는 Announcements 유형의 카테고리를 권장하기에, 저장소에서 카테고리를 신규로 하나 만든다.
- 저장소의 Discussions 탭 >
New Category버튼 > 원하는 카테고리명을 입력하고(저는Comments했어요)Announcement에 체크
연결하기
이제 Giscus에서 내 저장소 주소를 적어주고, 생성한 카테고리를 설정한다.
아래에서 script를 확인할 수 있다.
1
2
3
4
5
6
7
8
9
10
11
12
13
14
15

<script src="https://giscus.app/client.js"
    data-repo="gingaminga/gingaminga.github.io"
    data-repo-id="[repository id]"
    data-category="Comments"
    data-category-id="[category id]"
    data-mapping="pathname"
    data-strict="0"
    data-reactions-enabled="1"
    data-emit-metadata="0"
    data-input-position="bottom"
    data-theme="preferred_color_scheme"
    data-lang="ko"
    crossorigin="anonymous"
    async>
</script>
이 정보를 토대로 _config.yml에 필요한 정보를 기입한다.
1
2
3
4
5
6
7
8
9
10
11
12
13
14
15

comments:
  # Global switch for the post-comment system. Keeping it empty means disabled.
  provider: giscus # [disqus | utterances | giscus]
  ####### 중략 #######
  # Giscus options › https://giscus.app
  giscus:
    repo: gingaminga/gingaminga.github.io # <gh-username>/<repo>
    repo_id: [repo_id]
    category: Comments
    category_id: [category_id]
    mapping: # optional, default to 'pathname'
    strict: # optional, default to '0'
    input_position: # optional, default to 'bottom'
    lang: # optional, default to the value of `site.lang`
    reactions_enabled: # optional, default to the value of `1`
이제 로컬 개발환경을 재시작하고 확인해보면 댓글이 노출된다.
또한 댓글을 작성하고 GitHub Discussions로 가면 내 글 주소와 입력한 댓글이 보일거다!!
댓글 삭제는 관리자만 가능하고, 수정은 GitHub Discussions로 가서 내 댓글에 한해서 가능하다고 한다..!
This post is licensed under CC BY 4.0 by the author.